• Skip to primary navigation
  • Skip to main content
  • Skip to primary sidebar
Good Food From The Heart
  • Home
  • Recipe Index
  • About
  • My Story
  • Contact

Strawberry Blackberry Banana Smoothie (Packed With Protein!)

May 30, 2022 by jenniferprovenza 1 Comment

By Jennifer Provenza at Good Food From The Heart

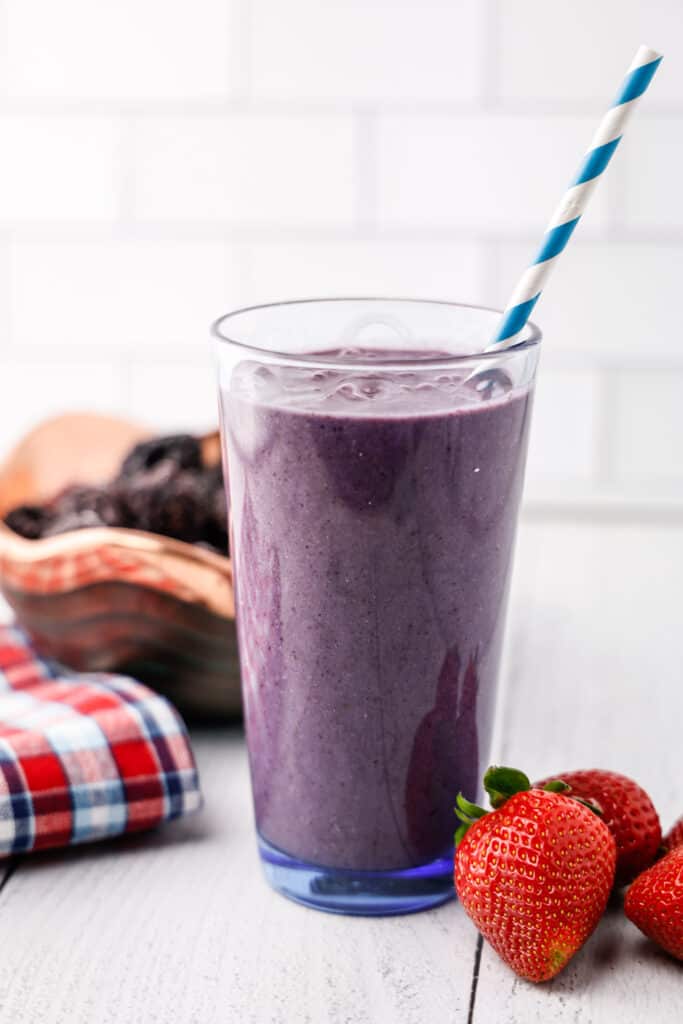
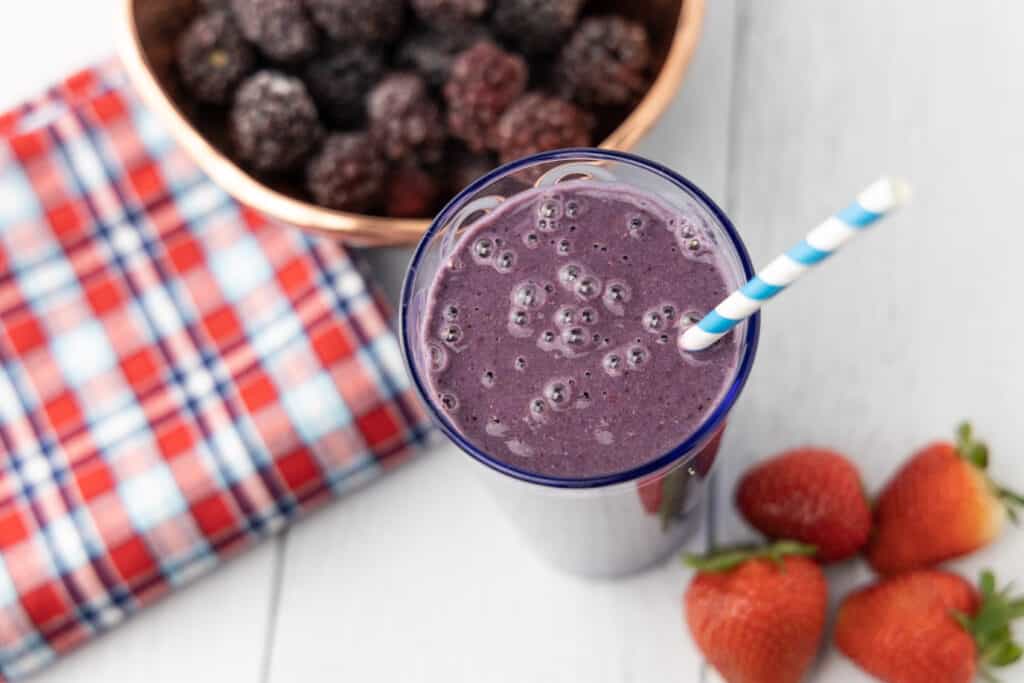
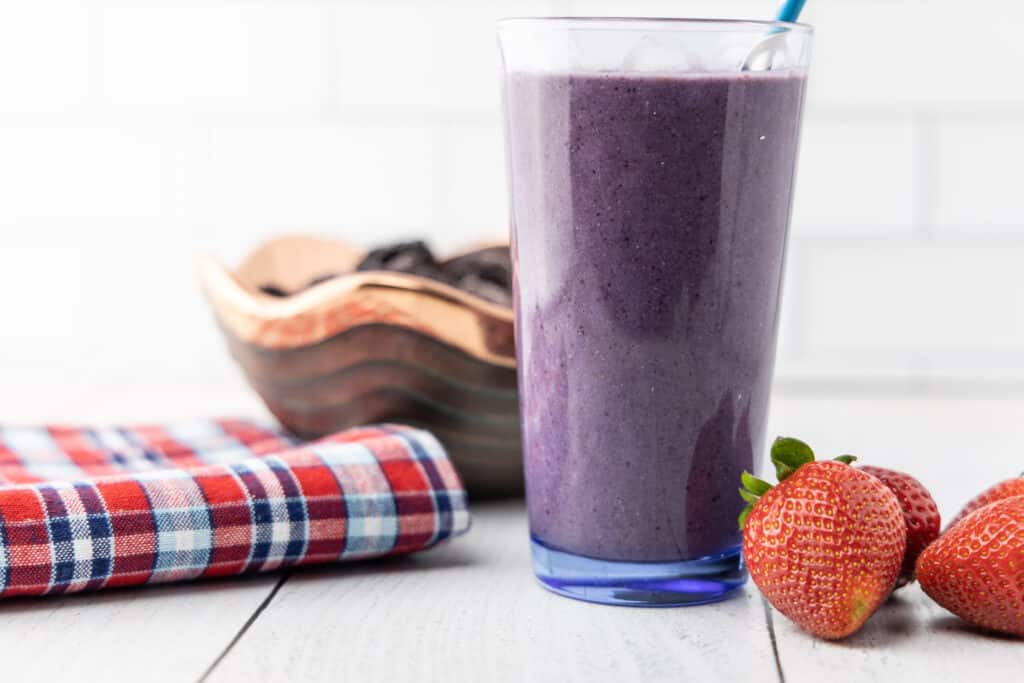
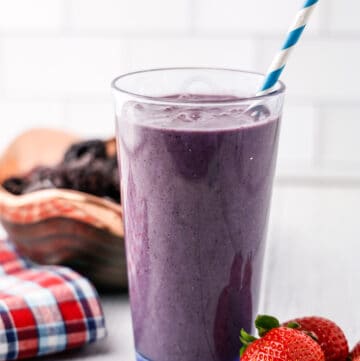
This sweet, vibrant purple strawberry blackberry banana smoothie tastes like a dream and is packed with protein to start your day or finish your workout.

Strawberry blackberry banana smoothie in a glass with strawberries and a napkin and a straw.

Whole Food Plant Based, Oil Free, Sugar Free, Soy Free

Why Drink This Smoothie

This strawberry blackberry banana smoothie is the perfect way to start your day. My favorite way to enjoy it is for lunch along with a slice of avocado toast. It’s also perfect workout fuel or a great post workout recovery drink. It’s not only packed with protein, but it will really satiate you too.

Ingredients

Strawberries: They add a lovely sweetness and color. Try to find the best fresh strawberries you can (I recommend the farmer’s market, if you have one.) Frozen berries are just fine too, especially if strawberries are not in season.

Blackberries: Blackberries are truly the star of this smoothie. Again, if you can get some perfect ones at the farmer’s market, go for it, but no shame in using frozen berries. Flash frozen berries actually keep all the vitamins and nutrients, unlike canned fruits, so feel free!

Banana: I love chopping up very ripe bananas and freezing them for smoothies. It saves bananas from going bad and gives me an endless supply to use for smoothies, oatmeal, nice cream, etc… Make sure to use a nice, ripe banana for a sweet flavor. I prefer to use frozen bananas rather than fresh, as it gives a gorgeous, ice creamy texture to the smoothie.

Chia Seeds: Chia seeds add protein and fiber, which will help keep you full and give you energy.

Almond Butter: The almond butter adds protein, healthy fat, and really makes this smoothie stick to your ribs.

Unsweetened Vanilla Almond Milk: I love vanilla almond milk, but make sure to get the unsweetened kind. The fruit is sweet enough!

Substitutions

For the fruit: You can leave out the strawberries (replace with more blackberries) or the bananas (replace with more strawberries). I would not recommend leaving out the blackberries, however, as that is the main flavor profile of the smoothie.

For the chia seeds: If you don’t have any or don’t want to use them, you can definitely leave them out and it won’t affect the flavor at all.

For the almond butter: You can replace with another nut butter or sunflower seed butter, or leave it out entirely. The smoothie will be less filling and contain less protein if you leave it out, however.

For the almond milk: You can replace with any other plant milk that you prefer.

Blackberry strawberry banana smoothie in a glass with a straw.

FAQ’s

Can I save this smoothie for later?

If you need to save some of the smoothie for later, simply place it in the freezer. Take it out to defrost about a half hour before you plan to consume it and stir it up well once it has defrosted.

Can I make a double or a half batch?

Yes, you can easily do that.

Is this smoothie vegan?

Absolutely! Just be sure to use a plant based milk.

Is this a healthy smoothie?

It’s made from whole foods and is free of added sugar or oil. It’s definitely a healthy choice!

Do I need a high speed blender to make this?

A regular blender will work just fine, but a high speed blender will blend the smoothie faster.

Can I use different fruit in this?

See the substitutions section, but the short answer is yes!

Can I leave out the nut butter or the chia seeds?

Yes! If you can’t have nuts, feel free to leave out the almond butter or substitute sunflower seed butter. The chia seeds add protein and fiber, but you can leave them out if you prefer.

How To Make This Smoothie

This protein packed smoothie could not be any easier to make. You may want to be thinking ahead and slice and freeze your banana ahead of time. Otherwise, feel free to use any combination of fresh and frozen fruits you prefer. I usually use all frozen fruits or maybe one variety fresh and the others frozen. If you don’t have any frozen fruit, you will want to add the optional ice cubes to get that frozen smoothie texture.

To make the smoothie, simply add all the ingredients to the blender and blend until completely smooth with no chunks of fruit visible. Pour into two glasses and serve immediately.

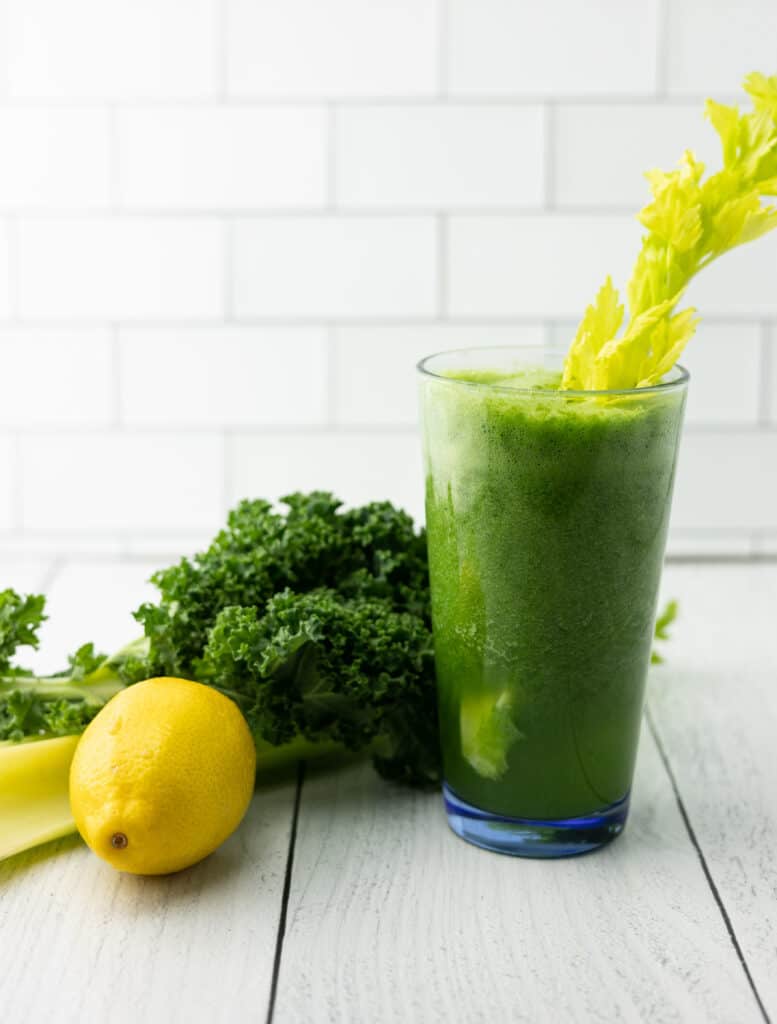
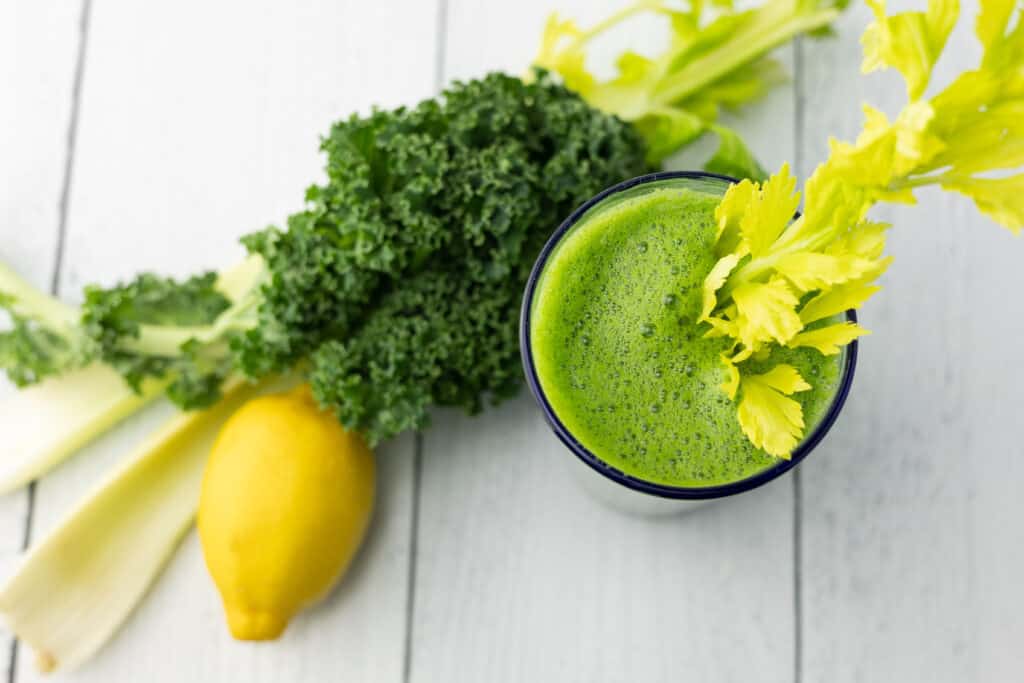
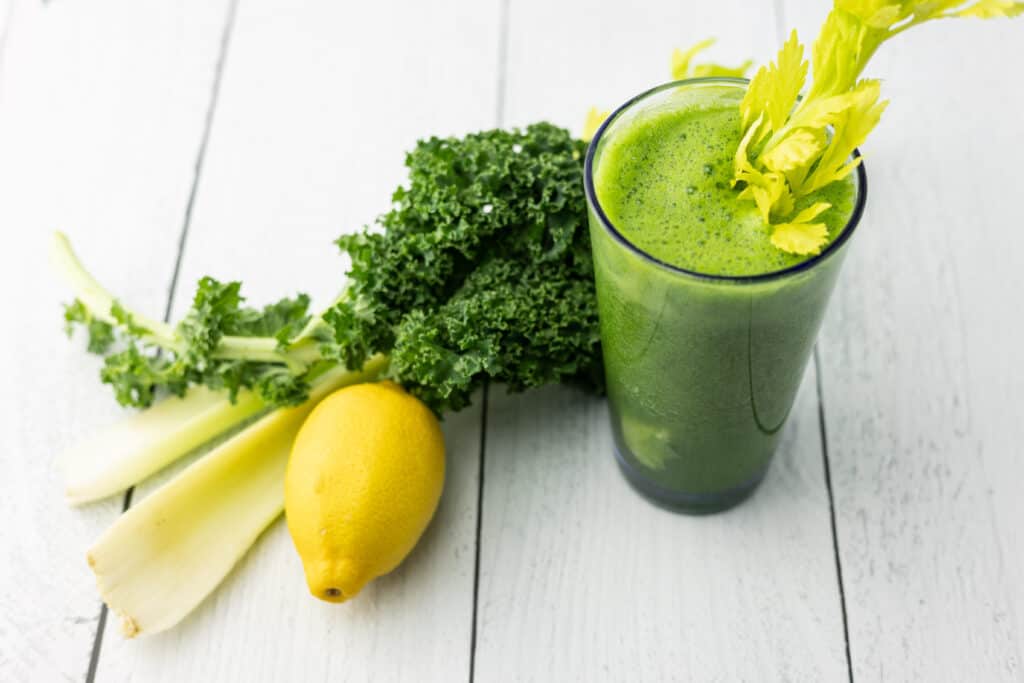
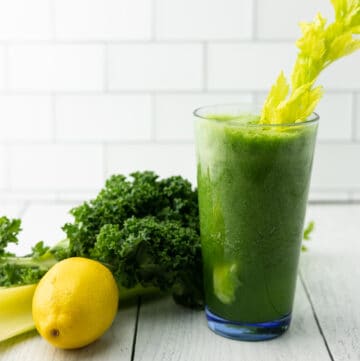
If you like smoothies, be sure to also try my Pretty Pink Pitaya (Dragonfruit) Smoothie Bowl, my Chocolate Covered Cherry Smoothie or my Immune Boosting Cucumber, Kale and Celery Green Smoothie.

Blackberry strawberry banana smoothie with a bowl, napkin, and berries.
Blackberry strawberry banana smoothie in a glass.

Strawberry Blackberry Banana Smoothie (Packed With Protein!)

This sweet, vibrant purple smoothie tastes like a dream and is packed with protein to start your day or finish your workout.
5 from 1 vote
Print Recipe Pin Recipe
Prep Time 5 minutes mins
Cook Time 0 minutes mins
Total Time 5 minutes mins
Course Breakfast, Snack
Cuisine American
Servings 2
Calories 270 kcal

Equipment

  • blender

Ingredients
  

  • 1 cup strawberries
  • 1 cup blackberries
  • 1 banana cut up and frozen
  • 2 cups unsweetened vanilla almond milk or plant milk of choice
  • 2 tablespoons almond butter
  • 1 tablespoon chia seeds
  • 2-3 ice cubes optional

Instructions
 

  • Add all ingredients to the blender and blend until completely smooth.
  • Pour into two glasses and serve.

Notes

You can use either fresh or frozen fruit, but be sure to add the ice cubes if you only use fresh fruit. I like to use a combination of fresh and frozen or all frozen.
Keyword smoothie

Follow me on Instagram @goodfoodfromtheheart and Pinterest at Good Food From the Heart and Facebook @GoodFoodFromTheHeart If you make this recipe, post it and be sure to tag me! Or Pin to Pinterest and make later.

Filed Under: Breakfasts, Drinks

Vegan Lemon Sugar Cookies (Lofthouse Style, WFPB)

May 10, 2022 by jenniferprovenza 2 Comments

by Jennifer Provenza at Good Food From The Heart

Perfect for Easter, Valentine’s Day, Halloween, or Christmas, these vegan lemon sugar cookies are decadent and delicious. Plus they are wfpb, oil free and come with a sugar free option. These Lofthouse style cookies hold their shape when baked and don’t spread, making them a perfect cut out cookie for the holidays.

Heart shaped and pink frosted lemon vegan sugar cookies on a plate with a pink doily.

Whole Food Plant Based, Oil Free, Sugar Free, Soy Free

Vegan Lemon Sugar Cookies…Yes Please!

When trying to bake without butter or refined sugar, sugar cookies are honestly one of the hardest recipes to master! I avoided this one for years because I simply could not figure out a recipe that tasted decadent enough for the holidays, yet didn’t contain butter or refined sugar. Because, while it’s easy enough to substitute vegan butter for regular butter, vegan butter is still full of unhealthy fats. Well, luckily, after much experimentation, I have a fool proof recipe that will have you celebrating in style, with ingredients you can feel good about.

These cookies are refreshing and melt in your mouth delicious. Make them today!

Ingredients

  • Whole Wheat Pastry Flour: Whole wheat pastry flour will give your cookies a light and wonderful texture. I like Bob’s Red Mill brand.
  • Almond Flour: The almond flour replaces the fat in the butter with a healthy fat. It also gives the cookies a delicate crumb.
  • Almond Butter: The almond butter also replaces the butter with more healthy fat and the taste is not detectable in the baked cookie.
  • Unrefined Sugar or Truvia: For this recipe, you can either use an unrefined sugar of your choice or, for a fully sugar free version, you can use a sweetener such as Truvia, which is a mix of stevia and xylitol, two natural sugar free sweeteners that don’t raise blood sugar.
  • Lemon Extract: This gives it that extra something special. Trust me, people will ask for the recipe once they try these cookies with a refreshing, melt in your mouth, lemon flavor.
  • Confectioners Sugar or Truvia: For the optional icing, either use regular confectioners sugar or a sugar free confectioners sugar substitute, such as Truvia. This is not a wfpb ingredient, but for a special occasion, you may really want to have some fun icing.
  • Natural food coloring: To add even more fun to the cookies, you may want to use some natural food coloring and vegan sprinkles (or the regular kind, if you aren’t worried about avoiding artificial dyes).

Substitutions

  • For the Whole Wheat Pastry Flour: In a pinch, you can substitute white whole wheat flour. Do not use regular whole wheat flour, as you will not get good results. I also cannot vouch for how gluten free flour would work in this recipe, as I did not test it.
  • For the Almond Flour: There is no good substitute for this, but feel free to make your own by blending almonds in a high speed blender.
  • For the Almond Butter: Any nut butter will work, but peanut butter will give the cookies a distinct flavor, so avoid that if you don’t want a peanut flavored cookie.
  • For the lemon extract: Almond extract or vanilla extract make excellent substitutes, although I do strongly prefer them with lemon extract.
Heart shaped and pink frosted lemon vegan sugar cookies on a plate with a pink doily.

FAQ’s

Can vegans really eat these sugar cookies?

Sure! And not just vegans, but those who follow a whole food plant based and oil free or sugar free diet can enjoy these too. Really, they are great for anyone! Even my kids liked them!

Are sugar free cookies healthy?

These cookies really are pretty healthy, believe it or not! With whole grain flour and healthy fat from nuts, these are just about the healthiest cookies you can make.

Can diabetics or people with gestational diabetes eat these cookies?

People who are diabetic may need to follow a specific diet and limit carbs, but made in the sugar free version, these cookies can likely be enjoyed in moderation by those who are diabetic.

How should I store these?

These cookies will keep for about a week in an airtight container or can be frozen indefinitely.

Will these vegan sugar cookies hold their shape and not spread?

Absolutely! That makes them perfect for cut out cookies. Make fun shapes for Halloween, Christmas, Valentine’s Day, Easter, etc…

How To Make Them

Begin by mixing together the whole wheat pastry flour, almond flour, baking powder, and salt. I like to use a whisk to make sure there are no lumps (and you know I’m too lazy to sift anything, good grief!) Use a medium bowl for this and then set it aside.

In a small bowl, mix the ground flaxseed and the water and let it sit for a few minutes to make a flax egg.

Next, check out your almond butter. If it is older or right out of the fridge, it may be too firm. In that case, you’ll want to heat it up a bit until it is more runny. Ideally, you can get a brand new jar of nice, runny almond butter and use that, as it will work perfectly in this recipe.

Once your almond butter is looking good, go ahead and put it in a large bowl and mix in the sugar or Truvia, the flax egg, and the lemon extract. Now, mix the dry ingredients into the wet ingredients and mix well. (You are also welcome to use a mixer for this process, but then you’re gonna have to wash it before you make the frosting, so think that one through carefully.)

Now, separate the dough in half, wrap it in plastic wrap or some other more environmentally conscious option, and pop it in the fridge for at least an hour.

Once the dough is chilled, lightly flour your clean counter or baking mat, and use a lightly floured rolling pin to roll the dough out. Roll it to about a 1/4 inch thickness. Now, you can go wild cutting out whatever fun shapes you want to. This is a great step to involve kids in. Personally, I like to start around the edges and try to really get as many shapes out of the dough as possible. Once you’ve done that, re-roll the excess dough and continue cutting out shapes. Do this until all of the dough has been used up.

Prepare a baking sheet by lining it with parchment paper and arrange the cut out cookies about two inches apart on the sheet. Bake for 12-15 minutes or until just starting to tan on the edges. The cookies should still look very soft. Don’t over bake them or they will be hard!

Allow the cookies to cool on the baking sheet for 5 minutes and then transfer them to a wire rack.

How To Make The Icing

The icing is super simple. In a mixer with a paddle attachment, mix the confectioners sugar or confectioners sugar substitute with the plant milk, the lemon extract, and the optional natural food dye. Feel free to make a few batches in different colors. If the frosting seems too runny, just add a little bit more sugar. If it seems too firm, just add a little bit more plant milk.

Time to Decorate!

Have a blast frosting and decorating the cookies with optional vegan sprinkles. This is also a fun step for kids to help with. Enjoy the cookies! They can be frozen indefinitely or stored in an airtight container for up to a week.

If you love desserts, don’t forget to try my Award Winning Vegan Fudgy Brownies or my Birthday Cake.

Heart shaped and pink frosted lemon vegan sugar cookies on a plate with a pink doily.

Vegan Lemon Sugar Cookies (Lofthouse style, WFPB)

Perfect for Easter, Valentine's Day, Halloween, or Christmas, these vegan lemon sugar cookies are decadent and delicious. Plus they are wfpb, oil free and come with a sugar free option. These Lofthouse style cookies hold their shape when baked and don't spread, making them a perfect cut out cookie for the holidays.
5 from 2 votes
Print Recipe Pin Recipe
Prep Time 20 minutes mins
Cook Time 15 minutes mins
1 hour hr
Total Time 1 hour hr 35 minutes mins
Course Dessert
Cuisine American
Servings 12
Calories 207 kcal

Equipment

  • 1 mixer
  • 1 sheet pan
  • parchment paper
  • wire rack

Ingredients
  

  • 1 1/8 cup whole wheat pastry flour
  • 1 1/8 cup almond flour
  • 1/2 teaspoon baking powder
  • 1/4 teaspoon salt
  • 3/4 cup almond butter
  • 3/4 cup unrefined sugar or 1/4 cup + 1 tablespoon Truvia
  • 1 tablespoon ground flaxseed
  • 2 tablespoons water
  • 1/2 teaspoon lemon extract

For the Icing

  • 1 cup confectioners sugar or Truvia
  • 1 cup plant milk
  • 1/4 teaspoon red food coloring (natural) or a few drops regular
  • 1/2 teaspoon lemon extract
  • few drops natural food dye optional
  • vegan sprinkles optional

Instructions
 

For the cookies

  • Preheat the oven to 350 degrees.
  • Start by whisking together the whole wheat pastry flour, almond flour, baking powder, and salt in a medium bowl.
  • If the almond butter is too firm, warm it up slightly until it has a more runny consistency.
  • Make the flax egg by mixing the ground flaxseed and the water in a small bowl and set aside for a few minutes.
  • In a large bowl, mix the almond butter and the sugar or Truvia. Add the flax egg and the lemon extract and stir.
  • Add the dry ingredients to the wet ingredients and mix until well combined. If the dough is too sticky, add more flour, one tablespoon at a time.
  • Divide the dough in half. Wrap each piece in plastic wrap and refrigerate for at least 1 hour.
  • On a lightly floured surface, use a lightly floured rolling pin to roll out the dough to approximately 1/4 inch thickness. Add flour as needed if the dough is too sticky.
  • Using a cookie cutter, cut the dough into shapes. Take any remaining dough, roll it out again, and continue to cut shapes from it. Repeat until all of the dough is shaped.
  • Place the cookies on a baking sheet that is lined with parchment paper. Be sure to place them at least two inches apart. Bake the cookies for 12-15 minutes or until just beginning to lightly tan at the edges. Cool for 5 minutes on the baking sheet and then transfer to a wire rack.
  • Wait until the cookies are completely cool before icing them.

For the Icing

  • Using a mixer with the paddle attachment, mix together the confectioners sugar or confectioners sugar substitute, the plant milk, the lemon extract, and the optional natural food dye. If the frosting seems too thick, add a little bit more plant milk. If it seems too thin, add a little bit more confectioners sugar.
  • Frost and decorate the cookies as desired.

Notes

Calories listed are for the sugar free version. You may substitute vanilla or almond extract for the lemon extract if you prefer.

Follow me on Instagram @goodfoodfromtheheart and Pinterest at Good Food From the Heart and Facebook @GoodFoodFromTheHeart If you make this recipe, post it and be sure to tag me! Or Pin to Pinterest and make later.

Filed Under: Uncategorized

Immune-Boosting Cucumber, Kale, and Celery Green Smoothie (No Fruit)

March 7, 2022 by jenniferprovenza 1 Comment

by Jennifer Provenza at Good Food From The Heart

With hearty kale, crisp celery, and juicy cucumber, this immune boosting smoothie will give you those vegetable nutrients you’ve been craving. This smoothie is refreshing and revitalizing when you aren’t feeling well, and will boost your energy and stamina when you are.

Whole Food Plant Based, Oil free, Sugar free, Gluten free, Soy free, Nut free

Why Drink This Immune-Boosting Cucumber, Kale, and Celery Smoothie?

Like a lot of people, I love smoothies! However, often, they are just full of sugar and can pack in more calories than you might want for a snack. Because, let’s face it, a smoothie is not a meal for most of us. Also, while I love fruit and eat it often, I sometimes find that I haven’t been getting in all the green veggies I should. I notice this especially in the winter when I don’t tend to eat a lot of salads. In fact, I often find myself craving green juice. Honestly, green juice can take some getting used to, but with just the right ingredients, it can be delicious! Best of all, I’ve noticed that when I regularly drink veggies I tend to get sick less and recover from illness faster. In fact, I was sick twice last month and I credit this juice and lots of homemade soup with helping me get back on my feet quicker, thanks to all the vitamins and nutrients I was getting! There is a great green juice at my local market, but it’s expensive and I don’t always have time to go there on busy days. Luckily, I discovered that I could create a smoothie with a similar flavor at home. It’s quick, easy, and pretty inexpensive too!

This immune-boosting cucumber, kale, and celery green smoothie is refreshing and delicious. With ginger and lemon, but no fruit or added sugar, this nourishing smoothie will have you feeling your best.

Ingredients

Kale: Kale is so healthy for you; it’s truly a superfood. Sometimes it gets a bad name, but in this smoothie, the flavor is really good.

Lemon Juice: The lemon juice offers vitamin C and a great tangy flavor.

Celery: The celery is full of antioxidants and adds a nice fresh flavor.

Cucumber: The cucumber is so fresh and delicious and also adds fiber and vitamin K.

Ginger: I use ginger paste, but you can also grate fresh ginger. It settles the stomach and adds a great zingy flavor.

Water Kefir or Coconut Water: The addition of water kefir or coconut water gives you some great probiotics or potassium and the lemon and ginger really open the nasal passages. (I like to use Kevita Lemon Cayenne water kefir). Be sure to look for a sugarless water kefir and just know that you will be getting some sugar if you use the coconut water option.

Substitutions

Substitution for the kale: Spinach makes a great substitute with a milder flavor. If you aren’t sure about kale or are new to green smoothies, try spinach instead.

Substitution for the other veggies: I wouldn’t recommend leaving out the cucumber, but you could replace the celery with more cucumber or even beets or carrots. You also could replace any of the veggies with fruit, such as pineapple or green apple.

Substitution for the liquid: You could use water or another juice if you prefer, but the water kefir or coconut water really give this smoothie a great flavor.

Substitution for the lemon juice or ginger: You can leave these out if you prefer, but they really add a great zing.

FAQ

Can I really put raw kale in a smoothie? And which part of the kale do I put into the smoothie?

You definitely can use raw kale in a smoothie! I use the leafy parts and skip the thick stalk.

Should I use water kefir or coconut water?

I love both! Personally, I tend to use water kefir which is nearly free of sugar and contains lots of probiotics for my gut health. If you can’t find that, coconut water is a great alternative. It has more sugar, but it also has lots of potassium and electrolytes.

Is there a way to make this green smoothie alkaline?

Yes! If you need to avoid acid, just leave out the lemon and use coconut water as the liquid.

What if I want to add fruit?

Look, there are no rules here. If you want to add fruit, you do you. Some people really like a little added sweetness. This smoothie particularly works well with pineapple. Or why not try a green apple celery smoothie? Or even a papaya celery smoothie?

Do I need a high speed blender to make this smoothie?

No, but it definitely helps. Honestly, the Vitamix was one of the best purchases I ever made (I get no kickbacks or anything, just sharing my opinion). I use it at least 1-3 times a day between making smoothies, soups, and sauces. It blends so perfectly and so quickly! I’m in love. However, you can definitely use a regular blender, you just may have to keep blending for a little while.

Can I drink one of these green smoothies every day?

Absolutely! I do, during cold and flu season, especially.

Can I make this green smoothie the night before and freeze it?

Yes, just remove it from the freezer at least a half hour before you plan to drink it (because it will be frozen solid) and stir before drinking.

What if I want a juice instead of a smoothie?

If you have a juicer, you can leave out the liquid and make a juice instead, but you will want to increase the amount of vegetables you use. You could also strain the smoothie through a nut milk bag to get a juice like consistency, but it will dye the milk bag green.

How to Make It

This really couldn’t be easier. Just pour the liquid into the blender, followed by all the other ingredients, and blend at high speed until it is completely smooth with no pieces of vegetable in it. Serve immediately. I like to follow this with a cappuccino because, coffee. But it would also go great with a healthy lunch or followed with a nice green tea. If you like smoothies, you may also like my Chocolate Covered Cherry Smoothie, my Strawberry Blackberry Banana Smoothie or my Pretty Pink Pitaya Dragon Fruit Smoothie

Immunity boosting green kale cucumber smoothie with celery and lemon.

Immune-Boosting Cucumber, Kale, and Celery Smoothie (No Fruit)

With hearty kale, crisp celery, and juicy cucumber, this smoothie will give you those vegetable nutrients you've been craving. This immune boosting smoothie is refreshing and revitalizing when you aren't feeling well, and will boost your energy and stamina when you are.
4 from 1 vote
Print Recipe Pin Recipe
Prep Time 5 minutes mins
Total Time 5 minutes mins
Course Breakfast, Snack
Cuisine American
Servings 2
Calories 63 kcal

Equipment

  • blender

Ingredients
  

  • 2 cups kale or spinach
  • 15 ounces lemon flavored water kefir or coconut water
  • 1 large english cucumber sliced
  • 2 pieces celery sliced
  • 1 teaspoon ginger paste or 1/4 teaspoon grated ginger
  • 1 tablespoon lemon juice
  • 1/2 green apple optional, chopped
  • 4-6 ice cubes optional

Instructions
 

  • Pour the water kefir or coconut water into a high speed blender. Add the remaining ingredients. If you need a sweeter smoothie, add the apple. Mix on high until well blended and smooth.

Notes

Serve immediately. 
Keyword smoothie

Follow me on Instagram @goodfoodfromtheheart and Pinterest at Good Food From the Heart and Facebook @GoodFoodFromTheHeart If you make this recipe, post it and be sure to tag me! Or Pin to Pinterest and make later.

Filed Under: Drinks, Recipes

Award Winning Vegan Fudgy Chocolate Brownies (Oil free, Sugar Free Option)

January 31, 2022 by jenniferprovenza 2 Comments

By Jennifer Provenza at Good Food From The Heart

These sinfully rich fudgy double chocolate brownies are beyond your wildest dreams. Vegan, oil free, sugar free, and dairy free. Perfect for Valentine’s Day!

Vegan fudgy oil free sugar free chocolate brownies stacked on a plate with raspberries.

Whole food plant based, Oil free, Sugar free

Hands Down Best Brownies Ever

Okay, so if you are like me you may have searched long and hard for a whole food plant based brownie recipe that actually tastes good. It’s especially hard if you also. need the brownie to be sugar free. I can’t tell you how many just okay or even plain bad recipes I’ve tried. I have managed to find a few decent vegan recipes, but they are just full of sugar and oil. Same with regular brownies that happen to be sugar free. Not bad. But, oh my gosh, finding one that is actually sugar and oil free and also still tastes like a real brownie? It’s the holy grail and (in my opinion) one of the most difficult recipes to perfect. Black bean brownies? Sorry, no. Not having it. I mean, they are fine, yummy even, but they aren’t fooling anyone. I wanted to create sinfully rich, actual honest to God brownies and guys…I have done it. These things were good enough to fool my kids. And that’s not easy. Not easy at all, my friends.

Okay, so we have a family tradition of making brownies for dessert on Valentine’s Day (along with heart shaped pizza), therefore, I baked my brownies in a heart shaped pan. Feel free to get festive with it, or just use a regular 8×8 inch square pan. Either way, you are going to end up with some nice substantial, tall, fudgy as hell brownies. Oh, yes.

Tips and Tricks

Almond Flour: If you cannot find almond flour in the store, you can easily make your own with a high speed blender. Simply blend the almonds until they reach the consistency of flour.

Sugar versus Sweetener: Make sure to use the listed amount in the recipe, as it is different depending on whether you choose to use coconut sugar or Truvia.

Whole wheat pastry flour: Whole wheat pastry flour is amazing! People are stunned when I tell them these brownies are made with whole wheat. You would never know it. You will not get the same result with regular whole wheat flour. In a pinch, you can substitute white whole wheat flour. White flour will work too, but will be much less healthy.

Mixing the dry ingredients: I find, with this recipe, that the dry ingredients had a lot of little lumps in them. Therefore, I would recommend either sifting them or (if you are lazy like me) mixing it with a whisk until the mixture is free from lumps.

Almond Butter: For this recipe, it’s really important that the almond butter is pretty runny. If possible, open a new jar for this and it should be just right. Older, hard, out of the fridge almond butter won’t mix well. You may, however, be able to heat it on the stove or microwave to get it more runny and mixable. Feel free to use chunky almond butter if you want some nut pieces in the brownies. Otherwise, use smooth.

Melting the chocolate: Make sure not to heat the chocolate chips for too long or they will seize and harden. It’s also important that the almond milk is at room temperature when you mix it into the chocolate or it may cause the chocolate to seize. If this happens, simply mix a tablespoon of hot water into the chocolate and it should fix the problem. It should be smooth and pourable.

How long to bake: It’s really important not to overbake these, because you really want to have that delicious soft texture. After 32 minutes, I check on them by inserting a knife or toothpick in the center. Unlike for cake, where you want it perfectly clean, it’s okay if the knife has just a little bit of chocolate sticking to it (or melted chocolate chip), but make sure it is not totally uncooked or runny in the center.

How long to cool: It’s really important to let these brownies cool for at least an hour in the pan or they will totally fall apart when you try to slice them.

How to store: I like to cover the brownies with foil or saran wrap and store on the counter for up to four days (if they last that long!) You can also freeze them.

FAQ’s

Can brownies really be made without oil?

Yes! They can. The secret is to use almond butter in place of the oil. The almond butter is a whole food that is full of protein and healthy fat as opposed to the empty calories in oil or butter. Luckily, you won’t be able to taste the difference!

Can I substitute peanut butter?

You sure can! These brownies actually taste absolutely amazing made with peanut butter. But, they will have a definite peanut butter flavor, so stick with almond butter if you want them to taste like regular brownies. You could also substitute a different nut butter.

How can you make brownies without using eggs?

Don’t worry! The ground flax seed in these brownies works as a perfect egg substitute. You just mix it with water and set it aside for a few moments and you will end up with a “flax egg.” You won’t be able to taste it and it will work just like an egg in the recipe.

What makes brownies more fudgy?

This is an important question. The sugar or sugar substitute is actually key to the fudginess of the brownie. Therefore, it is really important not to reduce the amount of sugar or sugar substitute in the brownie mixture, or you will end up with a more cake like brownie.

Can I use a different kind of flour?

I would not recommend it. The almond flour adds healthy fat and the right texture and the whole wheat pastry flour helps hold it all together. Don’t substitute regular whole wheat flour as it will not give you a tasty result. White flour would work fine, but will be much less healthy.

Should I use cocoa or cacao?

Cacao is a more healthy product, but they will work interchangeably. Personally, I am a huge fan of Guittard Cocoa Rouge and that is what I used in this recipe.

What kind of chocolate chips should I use?

For this recipe, I use Lily’s No Sugar Added Chocolate Chips. Be careful, many of their varieties contain milk, so just check the label. You can also just use any dark chocolate chips you wish to use, but check the sugar content if that matters to you.

What kind of sweetener should I use?

You can either use coconut sugar (which is an unrefined sugar) or, if you want them to be fully sugar free, you can use a sweetener like Truvia, which is a mix of stevia and xylitol. I have tried using pure liquid stevia, but it doesn’t seem to work so well for baking, so I stick with the powdered sweetener. Just be sure to follow the listed amounts in the recipe, as it is different for sugar or for Truvia.

How To Make These

Don’t worry, these brownies are not time consuming to make at all. Start by pre-heating your oven and preparing your pan. You can either spritz it with nonstick spray or prep it with parchment paper, or both.

Next, you’ll want to make your “flax eggs.” Just mix two tablespoons of ground flax seeds with four tablespoons of water and set aside. It will become a gelatinous mixture that works just like an egg in baking. Magic!

The next step is to mix your dry ingredients. If it’s lumpy, I recommend sifting or using a whisk to get the lumps out.

For the chocolate chips, you will want to set aside a half of a cup. The other half cut, you will melt. To melt the chocolate chips, heat in the microwave for thirty seconds or in a double boiler. Mix with the wet ingredients. If the chocolate seizes and hardens, add a tablespoon of hot water and stir it into the chocolate. (I had to do this).

Next, simply mix the wet and dry ingredients and stir. All that’s left to do is add the remaining chocolate chips and the optional nuts. Feel free to add coconut if you want.

Bake for 32-35 minutes in a 350 degree oven. A knife inserted in the center should come out (mostly) clean, but a little chocolate crumb sticking to it is fine. Cool at least an hour so that you can easily slice the brownies.

These whole food plant based brownies taste amazing with vegan ice cream or whipped cream on top or even with some frosting, if you desire. These are amazing while still warm, but taste just as good at room temperature. They are perfect to bring along on a picnic or serve as dessert on a special occasion.

If you like chocolate, you may also love these other recipes:

3 Ingredient Vegan Chocolate Mousse

Guilt Free Nice Cream (Chocolate Raspberry)

For other desserts, check out my Lofthouse Style Vegan Lemon Sugar Cookies.

Vegan fudgy oil free sugar free chocolate brownies stacked on a plate with raspberries.

Award Winning Vegan Fudgy Chocolate brownies

These sinfully rich fudgy double chocolate brownies are beyond your wildest dreams. Vegan, oil free, sugar free, and dairy free. Perfect for Valentine's Day!
5 from 3 votes
Print Recipe Pin Recipe
Prep Time 15 minutes mins
Cook Time 32 minutes mins
Total Time 47 minutes mins
Course Dessert
Cuisine American
Servings 12
Calories 196 kcal

Equipment

  • 8×8 square pan or fun shape, like a heart shape

Ingredients
  

Dry Ingredients

  • 2 tablespoons ground flax seeds + 4 tablespoons water
  • 3/4 cup whole wheat pastry flour
  • 1 1/2 cups almond flour
  • 1/2 cup cocoa or cacao
  • 1/2 teaspoon salt
  • 1/4 teaspoon baking soda
  • 1 1/4 cup coconut sugar or 1/2 cup + 2 teaspoons Truvia (stevia+xylitol blend)

Wet Ingredients

  • 1/2 cup almond butter
  • 1 cup stevia sweetened chocolate chips (divided)
  • 2/3 cup unsweetened vanilla almond milk at room temperature
  • 1 teaspoon vanilla extract
  • 1 tablespoon strong brewed coffee
  • 1/4 cup chopped walnuts optional

Instructions
 

  • Preheat your oven to 350 degrees and prepare your pan with nonstick spray and/or parchment paper.
  • Mix the ground flax seeds and water in a small bowl and set aside.
  • In a large bowl, mix the whole wheat pastry flour, almond flour, cocoa or cacao, salt, and baking soda. If it is lumpy, you may need to sift it or use a whisk to mix it together well.
  • Melt 1/2 cup of the chocolate chips (in the microwave or the top of a double boiler). If you microwave it, only microwave for 30 seconds at a time, then stir. If the chocolate seizes and hardens, you can rescue it by adding a tablespoon of hot water and stirring.
  • To the melted chocolate, add the flax seed mixture, the brewed coffee, almond milk, and vanilla extract.
  • Add the wet ingredients to the dry ingredients and stir well. Add the remaining 1/2 cup of chocolate chips and the walnuts, if using. Stir and pour into the prepared pan, spreading the top with a spatula to even out.
  • Bake for 32-35 minutes until a knife inserted in the center comes out mostly clean. (It may have some soft crumb or melted chocolate chip on it, but you don't want it to still be raw inside). Slightly undercooked will be good, though, and there is no raw egg to worry about.
  • Let the brownies cool in the pan for at least an hour, or they will break apart when you try to cut them. Serve with vegan ice cream or whipped cream or with a tall glass of ice cold almond milk.
Keyword brownies

Follow me on Instagram @goodfoodfromtheheart and Pinterest at Good Food From the Heart and Facebook @GoodFoodFromTheHeart If you make this recipe, post it and be sure to tag me! Or Pin to Pinterest and make later.

Filed Under: Desserts, Recipes

Peanut Butter Chocolate Swirl Mug Cake (Healthy, Vegan)

December 7, 2021 by jenniferprovenza 1 Comment

This ooey gooey healthy vegan peanut butter chocolate swirl mug cake is gluten free, sugar free, dairy free, and egg free. Takes just a few minutes to prepare! Healthy enough to eat for breakfast, decadent enough to serve for dessert!

By Jennifer Provenza at Good Food From The Heart

Delicious Treat for Cold Mornings-And evenings too!

Personally, once those temperatures dip and we get that early morning fog, I love to start my day with a warm and hearty breakfast. One that tastes as good as dessert is simply a bonus! This is one of my all time favorite recipes. Not only is it gluten free, sugar free, dairy free, egg free and essentially a healthy baked oatmeal, but guys… It literally tastes just like cake! And when you take this mug cake out of the microwave and top it with some cold coconut whipped cream and take a bite… Well this is just going to knock your socks off! When you taste the combination of warm, ooey gooey peanut butter and chocolate and the cold, creamy whipped cream, you will thank me for introducing you to this! In fact, it’s so decadent that I recently served it as dessert to dinner guests and they absolutely loved it! It actually is kind of like a self saucing chocolate mug cake because the interior is so soft and melty. Kids will love it too, guaranteed. They’ll even get a serving of fruit and whole grain! (Shh!)

Now, don’t worry. This cake comes together in just minutes and it is easy to make multiple servings quickly. You will just need to heat each mini chocolate peanut butter cake for a minute in the microwave. Easy peasy.

FAQ’s

Do I need to use a specific type of oatmeal for this recipe? Can I sub oat flour?

You can use quick or regular rolled oats. Do not use steel cut as it will not give you good results. Use certified gluten free oats if you follow a gluten free diet. You will be putting the oats in the food processor to make oat flour and while you could substitute store bought oat flour, I often find that it has a very bitter flavor, so I prefer to make my own.

What kind of peanut butter should I use? What is PB2?

Be sure to use unsweetened, natural peanut butter to keep this chocolate mug cake whole food plant based. PB2 is a powdered peanut butter option that is lower in calories (you reconstitute it with water). Regular peanut butter will be a richer option. Use whichever you prefer.

Should I use maple syrup or stevia to sweeten this?

That is totally up to you! Maple syrup will give you a sweeter and more rich result, but does contain sugar. If you need to avoid sugar (like my diabetic husband), stevia will be the better choice. Kids will usually prefer the maple syrup version.

Can I leave out the baking soda?

No, that will cause the cake not to rise and you will not get a good result.

How ripe does the banana need to be?

In my experience, a really ripe banana (like you would use for banana bread) gives the best result, but as long as it is ripe enough to eat, it will still work. You can also freeze really ripe bananas and use a frozen banana in this recipe. Just heat for a few seconds in the microwave to defrost it or leave it on the counter until it’s defrosted.

Can I substitute another nut butter?

Absolutely! If you are nut free you can definitely substitute sunflower seed butter. Other nut butters will still taste delicious, but will alter the flavor. Almond butter won’t really be detected and you will mostly just taste chocolate. That’s a great option if you are not a fan of peanut butter flavor.

Should I use cocoa or cacao?

Either is totally fine. Cacao is less processed than cocoa, but I use them interchangeably.

How To Make It

Okay, so this literally could not be easier. Just break the banana into a few pieces and place in the food processor. Add all the other ingredients and blend until completely smooth. You can easily make a double or triple recipe at once. (Just microwave each chocolate peanut butter snack cake individually).

Once your ingredients are blended, pour the mixture into a mug and microwave for one minute. It will be pretty hot, but be sure to eat it while it’s still warm! It hardens up a bit when cool and won’t be nearly as good. Don’t skip the coconut whipped cream (store bought or homemade) as it tastes simply delectable on top of your warm peanut butter chocolate swirl mug cake. Mmmm.

If you are a fan of chocolate desserts, you should also try my: 3 Ingredient Vegan Chocolate Mousse

Chocolate Covered Cherry Smoothie or my Guilt Free Nice Cream (Chocolate Raspberry)

self saucing chocolate mug cake baked oatmeal breakfast.

Peanut Butter Chocolate Swirl Mug Cake (Healthy, Vegan)

This ooey gooey healthy vegan peanut butter chocolate swirl mug cake is gluten free, sugar free, dairy free, and egg free. Takes just a few minutes to prepare! Healthy enough to eat for breakfast, decadent enough to serve for dessert!
5 from 1 vote
Print Recipe Pin Recipe
Prep Time 3 minutes mins
Cook Time 1 minute min
Total Time 4 minutes mins
Course Breakfast, Dessert
Cuisine American
Servings 1
Calories 390 kcal

Equipment

  • Food Processor
  • microwave

Ingredients
  

  • 1 banana ripe
  • 1/4 cup oats gluten free if necessary
  • 2 tablespoons peanut butter or pb2 + 1 1/2 tablespoons water
  • 2 tablespoons cocoa or cacao powder
  • 1 tablespoon maple syrup or 15 drops liquid stevia
  • 1/4 teaspoon baking powder
  • a dash salt

Instructions
 

  • Break the banana into three pieces and place all ingredients in a food processor. Blend until completely smooth.
  • Pour the contents into a mug and microwave on high for one minute.
  • Let cool for a minute or so, then top with coconut whipped cream and enjoy while still warm!
  • This recipe can easily be doubled, tripled, or even quadrupled. Just microwave each portion separately for one minute each.

Follow me on Instagram @goodfoodfromtheheart and Pinterest at Good Food From the Heart and Facebook @GoodFoodFromTheHeart If you make this recipe, post it and be sure to tag me! Or Pin to Pinterest and make later.

Filed Under: Breakfasts, Desserts, Recipes

Next Page »

Primary Sidebar

Delicious and Nourishing Food Made With Love

strawberry heart logo

About This Blog

I created this blog as a way to share my love of healthy cooking that also, (and frankly) most importantly, tastes absolutely delicious! All the foods on this blog contain completely whole foods plant based ingredients. This means I make them from unprocessed, plant based ingredients and do not include oil or refined sugars. Many of these recipes are gluten free (or have easy gluten free subs) and many are nut or soy free as well (or can easily be made so).

Archives

  • May 2022
  • March 2022
  • January 2022
  • December 2021
  • November 2021
  • October 2021
  • September 2021
  • August 2021
  • July 2021
  • June 2021
  • May 2021
  • April 2021
  • March 2021
  • February 2021
  • January 2021
  • December 2020

Copyright © 2025 Good Food From The Heart on the Foodie Pro Theme