• Skip to primary navigation
  • Skip to main content
  • Skip to primary sidebar
Good Food From The Heart
  • Home
  • Recipe Index
  • About
  • My Story
  • Contact

Vegan Stir Fry With Creamy Peanut Sauce (Oil Free, Sugar Free)

January 5, 2021 by jenniferprovenza 7 Comments

By Jennifer Provenza at Good Food From The Heart

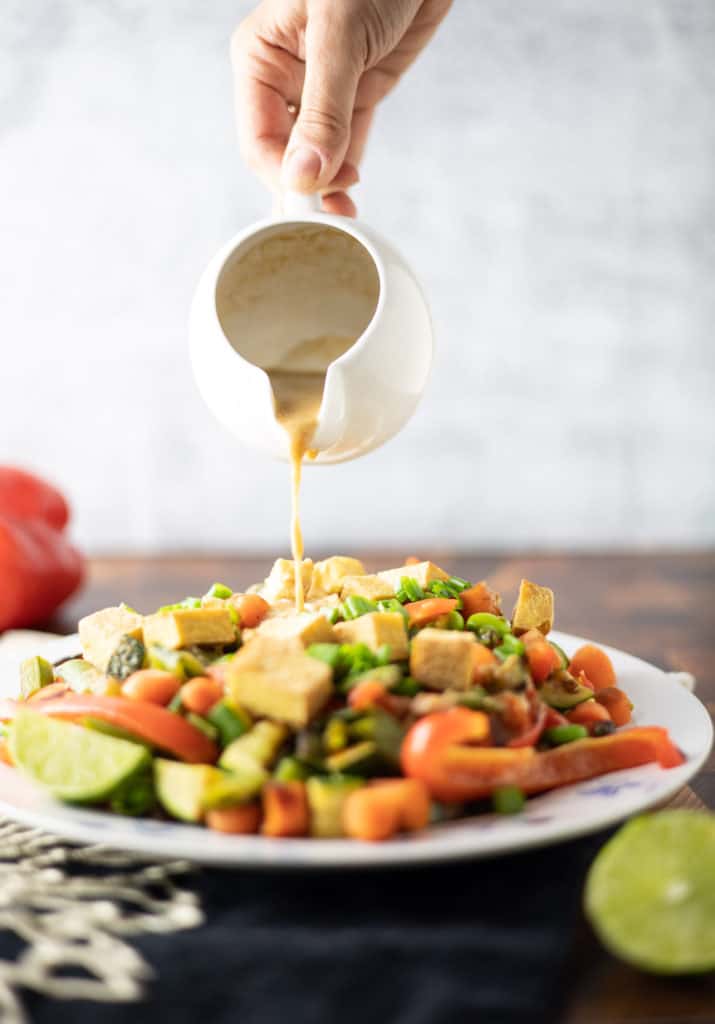
This vegan stir fry with creamy peanut sauce contains fresh, colorful vegetables, crispy tofu, and warm, soft brown rice noodles topped with a rich, delectable sauce.

Stir fry in a plate with peanut sauce being poured on.

Updated 5/30/2022

Whole foods plant based, oil free, sugar free, gluten free

Vegetable Forward Dinner

You are going to love this recipe. It comes together easily and is super healthy and filling. The best part, though, is the incredible peanut sauce. Feel free to make extra sauce and pour it over rice or vegetables any time. It’s a great meal to serve when you would like a detox from heavy holiday foods. This one finds a frequent rotation in my house in January.
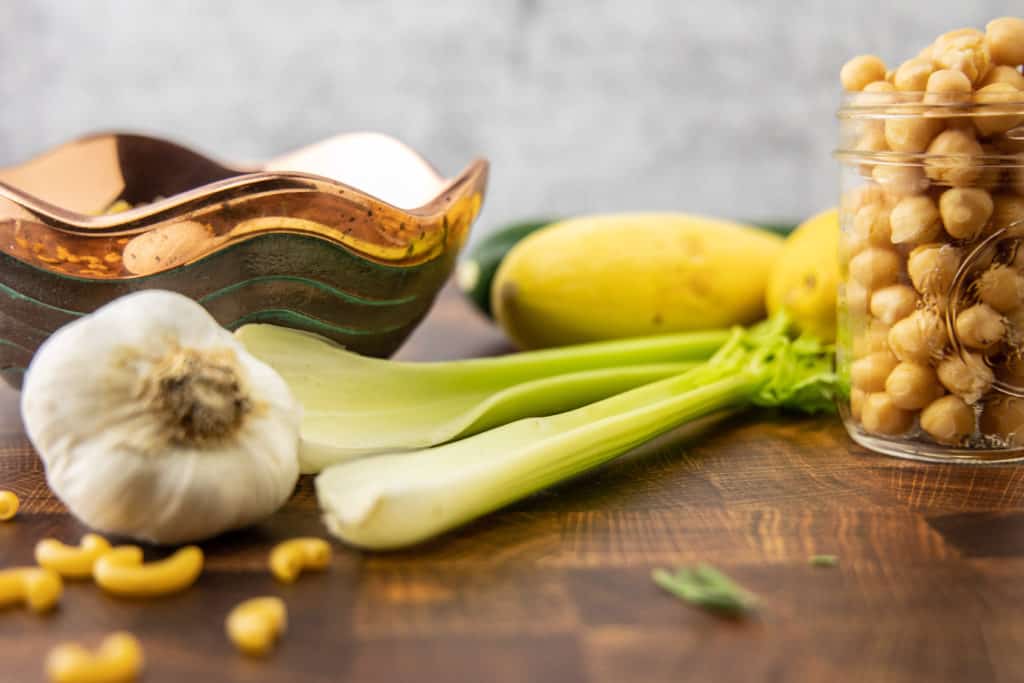
Ingredients

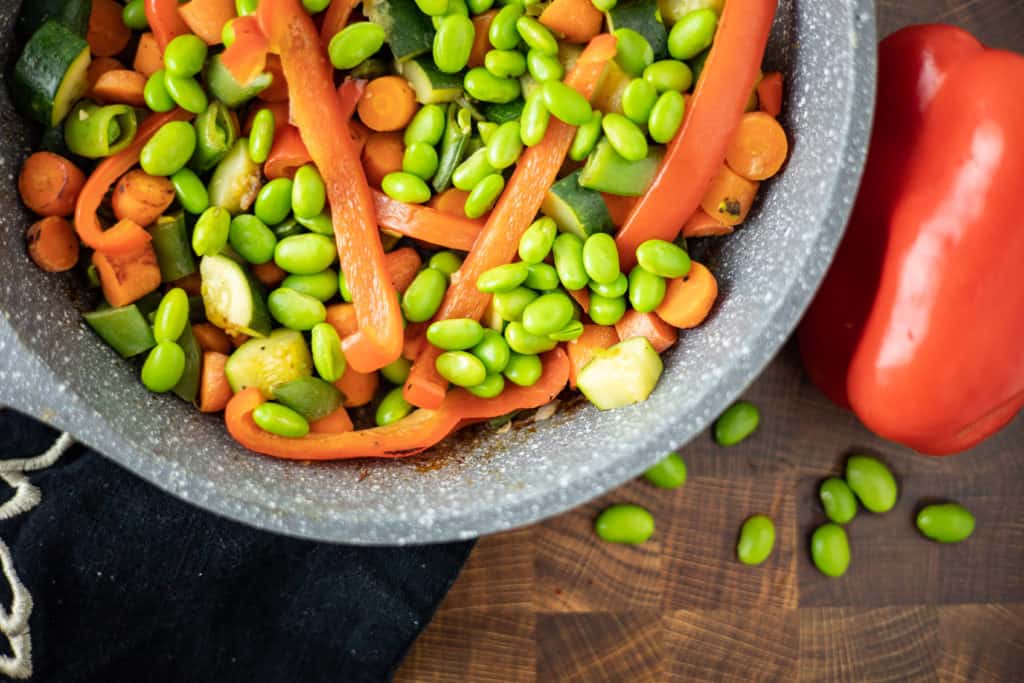
Vegetables/Edamame: The vegetables in this recipe are a colorful mix of both starchy and non starchy vegetables and beans. The more colorful the mix of vegetables, the wider range of vitamins you get, I also love to use something with some protein, such as edamame.

Tofu: Adds protein and heft.

Shallot/Green Onion/Garlic: These ingredients add some great flavor.

Noodles: The noodles make this dinner really have staying power and add whole grains.

Peanut Butter: This is the building block of the sauce and gives that great creamy texture and lots of protein.

Lime Juice: Adds a delicious fresh tangy taste.

Ginger: Gives a wonderful heat and flavor.

Tamari Soy Sauce: Adds a salty, umami taste. I use low sodium, otherwise I’m chugging water the rest of the night.

Stevia or Maple Syrup: This adds a lovely sweetness to the sauce. Maple syrup (an unrefined sugar) will give you the best flavor, but stevia will give you a completely sugar free option.

Substitutions

For the vegetables or edamame: Feel free to use any veggies or beans that sound good to you. Sweet potatoes would be good, as would chickpeas.

For the garlic/onions/green onions: You could leave any of these out if you need to, but the result will be less flavorful. Regular onions would be fine too.

For the noodles: Feel free to use brown rice, quinoa, couscous, etc…

For the tofu: If you can’t have soy, you could leave it out, but then I would add some chickpeas or something with protein and heft.

For the peanut butter: This sauce is best with peanut butter, but almond butter or any other nut butter will work too. If you have nut allergies, you can substitute sunflower seed butter.

For the tamari: Coconut aminos can be substituted for the tamari if necessary.

For the lime juice: You could use lemon juice instead, but I really prefer the taste of lime.

FAQs

Is this sugar free peanut sauce healthy?

Yes! The peanut butter is high in fat, but it is a healthy fat and all other ingredients are pretty low calorie.

What veggies go well with this peanut sauce?

In addition to those in the recipe, I love using sweet potato, chickpeas, or broccoli.

What else does this peanut sauce go well with?

This vegan satay sauce is also excellent over a bowl of brown rice or on top of a Buddha bowl. It can even be used on a salad.

Can I double this recipe?

Yes! You may just need to cook the vegetables in more than one batch.

How can I store this?

It will keep for a few days in the refrigerator. The sauce can be frozen indefinitely.

Stir fry in a pan.

How To Make This Vegetable Stir Fry With Peanut Sauce

Make the brown rice ahead of time if you decide to serve over rice. (Alternatively, you could serve over quinoa, cauliflower rice, couscous, etc…) I prefer this served over brown rice noodles, which you can cook as you are doing the stir fry.

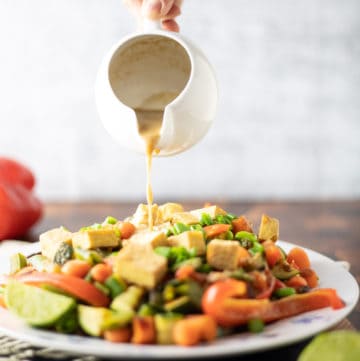
First, whip up that peanut sauce. All you need to do is mix all the ingredients, heat, and whisk to combine thoroughly.

Then cut up all the vegetables. Set those aside and get the tofu going. I cut into cubes and cook in the air fryer (you can add a spritz of nonstick spray and a dash of salt and pepper). I cook at 370 degrees for 15 minutes. I love the tofu in this recipe when cooked in an air fryer, but if you don’t have one, you can cook it in a nonstick pan instead. Simply spritz with nonstick spray, sprinkle with salt and pepper, and cook for a few minutes on each side, until lightly browned. Speaking of the tofu, if you want to save time, try to find pre-pressed tofu so that you don’t have to bother pressing the water out of it. Otherwise, you just have one extra step to do.

Then cook the garlic and shallot over medium heat in a non stick pan. Use a little vegetable broth or water to keep it from sticking. Cook until the shallot turns translucent.

Stir fry in a pan.

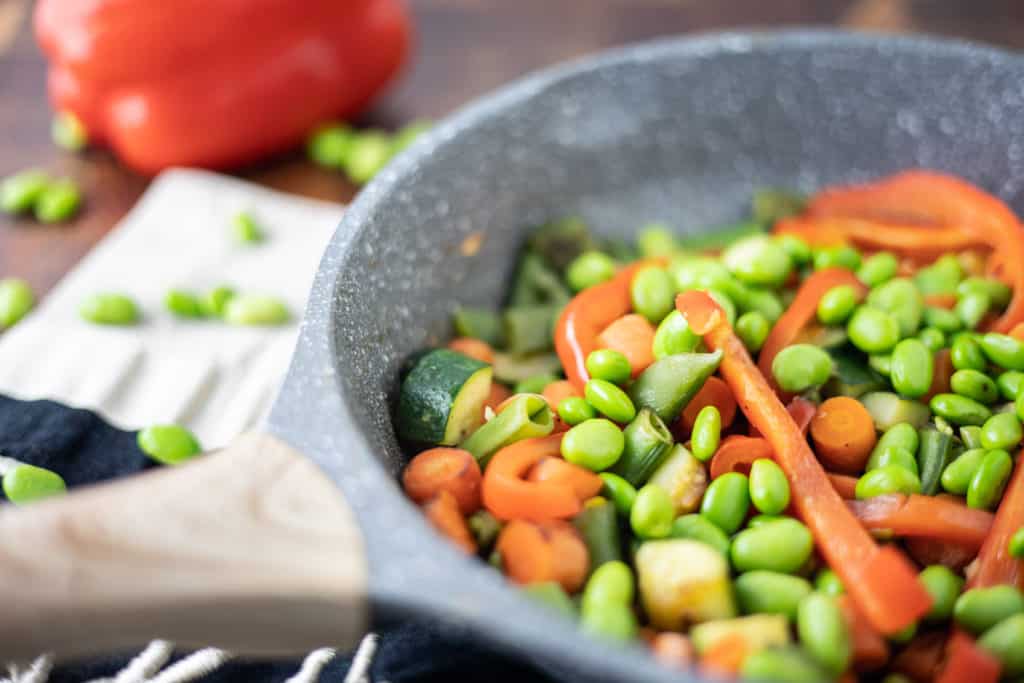
Add the veggies, and cook until they are reasonably tender (but not soggy).

Now, you are ready to combine all the ingredients. Simply divide the brown rice noodles between 2 or 3 plates, top with the vegetable mixture and the tofu, and drizzle with peanut sauce.

To finish, you might top with chopped peanuts, green onions, and wedges of lime. It also goes great with my Vanilla Bean And Rose Lemonade. If you love vegetables, you should also try my Vegan Vegetable Noodle Soup.

Stir fry in a plate.
vegetable stir fry with sauce being poured on

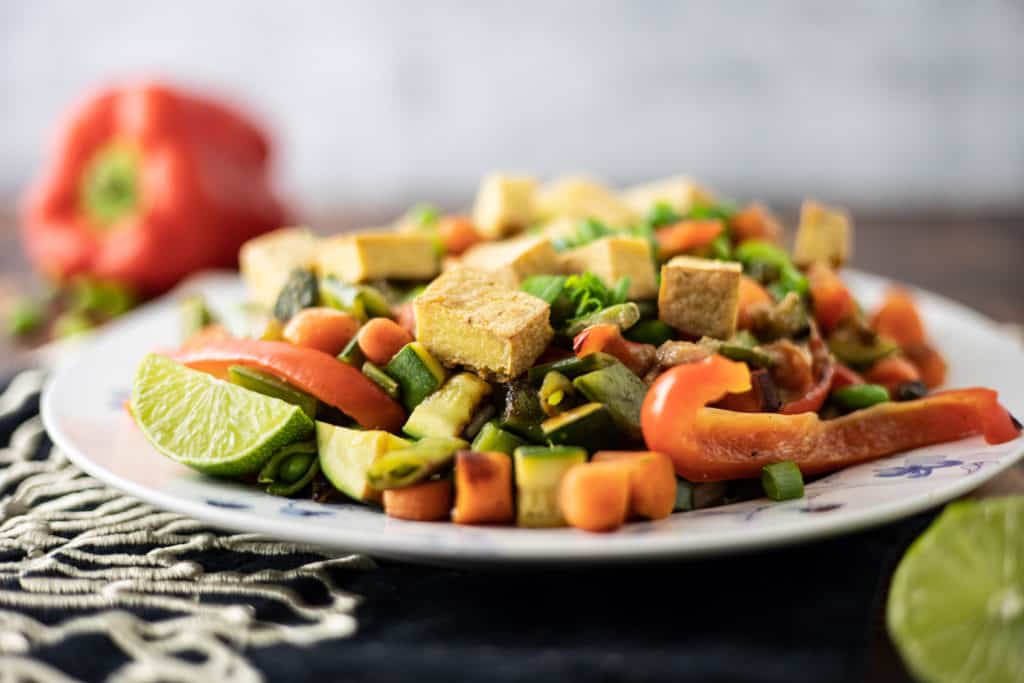
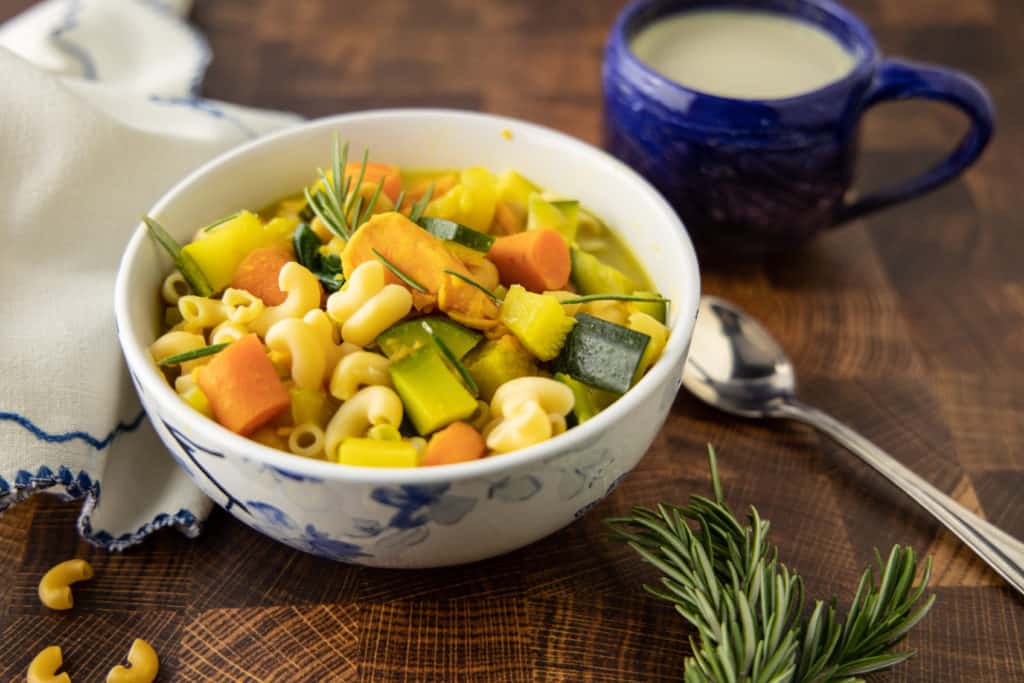
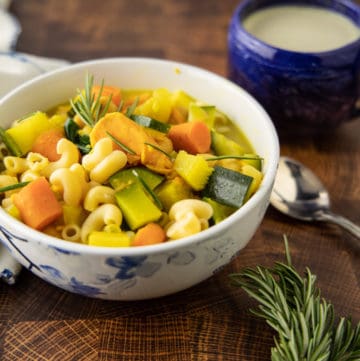
Vegetable Stir Fry With Peanut Sauce, Brown Rice Noodles and Crispy Tofu

Jennifer Provenza
A fresh, colorful plate of vegetables, crispy tofu, and warm, soft brown rice noodles topped with a delectably rich and creamy peanut sauce.
4.75 from 4 votes
Print Recipe Pin Recipe
Prep Time 10 minutes mins
Cook Time 15 minutes mins
Course Main Course
Cuisine American, Chinese
Servings 2
Calories 607 kcal

Equipment

  • Non Stick Pan
  • Sharp knife
  • Cutting board
  • Spatula or long handled spoon
  • Small bowl
  • Large pot with lid
  • Pasta strainer
  • Optional: air fryer

Ingredients
  

For Stir Fry

  • 1 clove garlic crushed
  • 2 teaspoons shallot minced
  • 2-4 tablespoons vegetable broth or water
  • 1 cup carrots diced
  • 1 small zucchini chopped
  • 1/2 red pepper sliced thin
  • 1 cup snap peas chopped
  • 1/2 cup edamame shelled
  • 2 tablespoons green onion minced
  • 2 tablespoons peanuts
  • 1/2 block firm or extra firm tofu pressed

For Sauce

  • 1 clove garlic crushed
  • 1/4 cup smooth peanut butter
  • 3 tablespoons tamari soy sauce
  • 1 tablespoon ginger paste or fresh ginger
  • 1/4 teaspoon pure liquid stevia (or 2 tablespoons maple syrup)
  • 1/4 cup water
  • 2 tablespoons lime juice freshly squeezed

For Serving

  • 8 ounces thin brown rice noodles (or 1 cup brown rice)

Instructions
 

  • If you plan to serve over rice, cook the brown rice about an hour ahead of the time you want to eat. Boil two cups of water and add one cup of brown rice. Cover and simmer for about an hour until water is absorbed. If you plan to serve over brown rice noodles, follow the directions below.
  • Begin by making the peanut sauce. To a small bowl, add the garlic, peanut butter, tamari soy sauce, ginger, stevia or maple syrup, water, and lime juice. Microwave for 30 seconds and stir. If the peanut butter can smoothly be stirred in, you have heated long enough. If not, try another 30 seconds in the microwave and then stir the sauce again. (You can also heat on the stovetop if you prefer). If the sauce seems too thick, you can add a little water or more lime juice. Set aside.
  • Chop all vegetables.
  • Either press your tofu between a folded kitchen towel or use a tofu press to drain it. Even better, if possible, start with pre-pressed tofu (this is what I do). Cut your cube of tofu in half, wrap up and store one half in the refrigerator and then slice the half you will be using into small bite sized squares. Preferably, spray with a little non stick spray and cook in an air fryer for 15 minutes at 370 degrees. If you don't have an air fryer, spray a non stick pan with a small amount of non stick spray and cook the tofu over medium heat until lightly crisp. Turn the tofu slices over and repeat on the other side. Set aside.
  • Add the garlic, shallot, and vegetable broth or water to the non stick pan. Cook, over medium heat, until the shallot is translucent. As you cook, add more broth or water as necessary to keep the vegetables from sticking to the pan.
  • While the shallot and garlic are cooking, fill a large pot with enough water to cover the noodles, put on the lid, and bring to a boil over high heat.
  • Add the carrots, zucchini, snap peas, red bell pepper, and edamame to the pan with the shallot and garlic. Continue cooking, adding more broth or water as necessary, for about fifteen minutes, stirring frequently.
  • Meanwhile, when water is boiling, add the brown rice noodles and cook according to the package directions.
  • When the vegetables are soft enough to your liking (but still retain some crispness), remove from heat.
  • Check to see that the noodles are finished cooking and then drain.
  • To assemble: Divide the noodles between two plates, top each with half of the vegetable mixture and half of the tofu. Sprinkle a tablespoon each of green onions and peanuts over each plate and drizzle with peanut sauce. This recipe can easily be doubled, but you may need to cook the vegetables and/or tofu in two batches. Leftover peanut sauce goes great over rice or vegetables as a side dish.
Keyword Stir fry

Follow me on Instagram @goodfoodfromtheheart and Pinterest at Good Food From the Heart and Facebook @GoodFoodFromTheHeart If you make this recipe, post it and be sure to tag me! Or Pin to Pinterest and make later.

Filed Under: Mains, Recipes Tagged With: brown rice, noodles, stir fry, tofu, vegetables

Vegan Vegetable Noodle Soup (Whole Food Plant Based)

January 2, 2021 by jenniferprovenza 1 Comment

By Jennifer Provenza at Good Food From The Heart

This fragrantly spiced winter vegan vegetable noodle soup will stick to your ribs and gives you lots of immune boosting goodness on a cold day.

Vegan vegetable noodle soup in a bowl with herbs.

Updated 5/30/2022

Whole foods plant based, Oil free, Sugar free, Gluten free, Soy free, Nut free

Soup

One of my favorite ways to get back on track with healthier eating is to make a lot of soups for dinner. Soup is warm and delicious and very filling, but high in fiber. I can eat a lot of soup and still feel that I have not overeaten. Soup just makes me feel…nourished. What is more comforting than a bowl of hearty soup?

Vegetables on a counter with beans and noodles.

Ingredients

Garlic/Shallots: Adds a depth of flavor.

Vegetable broth: Personally, I save time by buying boxed organic vegetable broth, but feel free to make homemade broth for an even tastier result.

Light Coconut Milk: This adds a delicious richness to the soup.

Pasta: I love Banza chickpea pasta, but feel free to use any whole grain or gluten free pasta you prefer.

Canned tomatoes: Adds a great umami flavor. I like to buy them in a carton if possible to avoid BPA in cans.

Vegetables: I love the combination in the recipe, but feel free to mix up the vegetables as you prefer.

Beans: The beans add protein and help fill you up. Use any beans you prefer.

Lemon zest: Don’t skip this, as it adds a wonderful brightness and depth of flavor.

Spices/Herbs: These all really add to the flavor of the soup, so don’t skip them, but feel free to change it up based on what you have on hand.

Substitutions

For the vegetables: Change it up as you desire.

For the herbs/spices: Don’t skip these, but feel free to experiment with different ones.

For the pasta: Any type of whole grain or gluten free pasta will work. You could use rice if you prefer as well.

FAQs

Can you freeze vegetable noodle soup?

It will keep for several days in the refrigerator and can be frozen indefinitely.

How do you add richness to vegan soup?

The light coconut milk really adds richness and creaminess to this soup. You can use full fat coconut milk if you prefer, but that will add a lot of calories and fat.

Is whole food plant based vegetable soup healthy?

Absolutely! This nourishing soup is really good for you. It’s also a great meal to eat if you aren’t feeling well. If you keep some in the freezer, you can always heat it up if you are feeling under the weather.

What can I add to vegetable soup to make it taste better?

This is where the sweet potato and coconut milk come in. They really bring the soup to the next level. Feel free to add a little heat too.

What kind of noodles are vegan? What kind of noodles should I use in this soup?

I love Banza chickpea noodles or brown rice noodles, which are also gluten free. Whole wheat noodles also taste great.

How To Make This Vegan Vegetable Noodle Soup

This is one of my favorite soup recipes! It is so flavorful and it really sticks to your ribs.

Just like with any typical soup, you’ll start by cooking the shallot and garlic in a large pot over medium heat. (You can use onion, but shallot is gentler on my stomach and I like its small size, since I like to use a small amount). Just use water or vegetable broth to keep it from sticking to the pot. Once the shallot is translucent, add the veggies and a bit more broth and cook for a few minutes.

After that, it’s as simple as adding the broth, canned light coconut milk, the canned tomatoes, the chickpeas, and all the spices. You can use full fat coconut milk if you want, but it will up the calories and richness a lot. You are also welcome to use fresh tomatoes or chickpeas cooked from scratch, but this is the easy version. (And it tastes just as good). Then cover, bring to a boil, turn down to a simmer, and let cook until the vegetables are easily pierced with a fork.

Remove from the heat and add the lemon zest and juice and the spinach.

Serve over chickpea or whole grain pasta or brown rice. I love Banza chickpea pasta. It’s also great topped with my So Good It’s Nuts “Parmesan”. Note: It’s important not to cook the pasta or rice in the pot with the soup because it will use up too much of your broth and the pasta will get too soft. This makes great leftovers for lunch, especially paired with my Perfect Pumpkin Spice Latte. If you like veggies, also try my Vegan Stir Fry with Creamy Peanut Sauce.

Vegan vegetable noodle soup in a bowl with herbs.
Vegetable noodle soup

Vegan Vegetable Noodle Soup

Jennifer Provenza
This fragrantly spiced winter vegetable soup will stick to your ribs and gives you lots of immune boosting goodness on a cold day.
Print Recipe Pin Recipe
Prep Time 10 minutes mins
Cook Time 30 minutes mins
Course Main Course
Cuisine American, Mediterranean
Servings 6
Calories 202 kcal

Equipment

  • Large pot

Ingredients
  

  • 1-3 cloves garlic crushed
  • 2 tablespoons shallot minced
  • 4 tablespoons water or vegetable broth
  • 1 zucchini chopped
  • 1 yellow squash chopped
  • 2 cups sweet potato chopped
  • 1 cup green beans chopped
  • 2 carrots chopped
  • 2 pieces of celery chopped
  • 3 cups vegetable broth
  • 1 1/2 cups canned light coconut milk
  • 1 14 ounce can diced tomatoes
  • 1 14 ounce can chickpeas or other beans drained and rinsed
  • 1 tablespoon ginger (fresh or ginger paste)
  • 1 1/2 teaspoons cumin
  • 1 1/2 teaspoons turmeric
  • 1 1/2 teaspoons sea salt (or to taste)
  • 1 tablespoon fresh rosemary
  • 2 cups fresh spinach
  • zest of one lemon
  • juice of 1-2 lemons

To Serve

  • whole grain or chickpea pasta or brown rice
  • fresh rosemary

Instructions
 

  • Cook the minced shallot and garlic in a large pot with the vegetable broth or water over medium heat until the garlic and shallot are translucent.
  • Add the zucchini, squash, sweet potato, green beans, carrots, and celery. Cook for a minute or two, adding a splash of broth if necessary to keep from sticking.
  • Add the broth, light coconut milk, tomatoes, and rinsed and drained beans. Stir.
  • Add the ginger, cumin, turmeric, sea salt, and fresh rosemary. Stir, cover, and raise the heat to medium high until the soup begins to boil. Lower the heat to the lowest setting and allow to simmer, covered, for a half hour.
  • Check that the vegetables are easily pierced with a fork. If so, remove from heat and add the spinach and lemon zest and juice. Stir.
  • Adjust seasonings to taste. Serve over whole grain or chickpea pasta or brown rice.
Keyword soup

Follow me on Instagram @goodfoodfromtheheart and Pinterest at Good Food From the Heart and Facebook @GoodFoodFromTheHeart If you make this recipe, post it and be sure to tag me! Or Pin to Pinterest and make later.

Filed Under: Mains, Recipes Tagged With: noodles, soup, vegetables

Rich Vegan Dark Chocolate Mousse (3 Ingredient)

January 1, 2021 by jenniferprovenza Leave a Comment

By Jennifer Provenza at Good Food From The Heart

3 ingredient vegan mousse in jars with champagne on a table.

Updated 4/29/22

Plant Based (mostly whole foods), oil free, sugar free, gluten free, soy free, nut free

This deep, dark chocolate coconut 3 Ingredient vegan chocolate mousse is truly worthy of a celebration. Creamy, velvety and rich. It’s a keto friendly chocolate mousse that will knock your socks off!

Vegan Mousse De Chocolate

This dessert is so incredibly rich that you won’t believe it’s vegan! In fact, it’s super easy to make and will impress guests for any special occasion. It’s even kid approved! Just like regular mousse, it’s airy and light with a whipped cream quality, yet it’s totally dairy free and eggless.

Ingredients

Dark Chocolate: Be sure to use dark chocolate and check to see that there is no milk added. I personally love Lily’s sugar free chocolate. The quality of the chocolate very much affects the quality of the mousse, so get the best chocolate you can.

Coconut Milk: For this recipe, you will need to use full fat coconut milk.

Liquid Stevia or Maple Syrup: For a fully sugar free dessert, use the liquid stevia. Otherwise, the maple syrup will give you a delicious result.

Shredded Coconut: The optional shredded coconut adds a pretty touch, but is not necessary.

Substitutions

For the chocolate: Fun twist! You can totally substitute vegan white chocolate for the dark chocolate and you’ll have a vegan white chocolate mousse. Delicious! Also feel free to substitute vegan milk chocolate for a slightly less rich dessert. You could even add crushed oreos for a vegan oreo mousse!

For the coconut milk: For a much lower calorie version of this dessert, you can actually whip up the liquid in a can of chickpeas (known as aquafaba). You may have to whip it in a mixer for up to fifteen minutes, but at that point, you can use it in the recipe. This version will be more airy and less rich, but still delicious.

For the liquid stevia or maple syrup: Feel free to use the sweetener of your choice, just check the conversion amounts.

3 ingredient vegan chocolate mousse in a jar with coconut on top.

FAQS

Is dark chocolate vegan?

Yes, usually! Check the ingredients just to be sure.

What is vegan mousse made of and will it taste as good as traditional mousse?

Yes! In my opinion, it’s even better! Regular chocolate mousse is not vegan as it contains egg whites or whipped cream. This eggless chocolate mousse only uses three ingredients: coconut milk (or aquafaba), stevia or maple syrup, and dark chocolate.

How can I store this?

You can keep this in the refrigerator for up to three days, but be sure to let it sit at room temperature for about an hour before serving or it will be quite hard. (This is only an issue with the coconut milk version).

Why isn’t my chocolate mousse fluffy?

You may need to let it sit at room temperature if it has hardened. This mousse is best made and served right away.

How To Make It

This dark chocolate coconut mousse is super simple to whip up in a few minutes. I like this Thai Kitchen brand.

You want to start with a 3.5 ounce dark chocolate bar. I like to use Lily’s chocolate which is sweetened with stevia, but you could also use unsweetened and add extra sweetener or your favorite dark chocolate baking bar.

Chop the chocolate bar and melt, either in the microwave at 10 second intervals (stirring between) or on the top of a double boiler.

Next, separate out the coconut cream that has risen to the top of the cans (don’t include the thin, watery liquid beneath) and whip in a mixer until stiff peaks form. Remove and mix with the melted chocolate. Add the liquid stevia or maple syrup, top with the coconut, and serve. You could also top with berries or more whipped coconut cream.

If you want to make a lower calorie version, feel free to substitute aquafaba for the coconut cream. Aquafaba is simply the liquid in a can of chickpeas. Save the chickpeas and set aside for later. I like to season them and cook them in the air fryer for 15 minutes at 370 degrees for a tasty, salty, crunchy snack.

Put the aquafaba in a mixer and beat until stiff peaks form. (This will take around 9 minutes but could take up to 15). Then fold into the chocolate mixture, add your liquid stevia or maple syrup, and put into individual serving cups.

Note that if you prepare in advance and refrigerate, you will want to remove this dessert from the fridge about an hour before serving, or it will have hardened and lost its creamy texture.

You can double this recipe easily. Also, keep in mind that while you won’t end up with a very large amount of mousse, this recipe is very rich, so serving sizes can be pretty small. This would make a great dessert to serve after my Fresh and Festive Pesto Pasta. This would also make a delicious vegan chocolate mousse cake if you use this as mousse as frosting or filling. If you love chocolate, be sure to also try my Peanut Butter Chocolate Swirl Mug Cake and my Award Winning Vegan Fudgy Chocolate Brownies.

3 ingredient vegan chocolate mousse on a table with glasses of champagne.
Dark Chocolate Coconut Mousse

Rich Vegan Dark Chocolate Mousse (3 Ingredient)

Rich, creamy dark chocolate and coconut combine in a dessert worthy of celebrations.
Print Recipe Pin Recipe
Prep Time 15 minutes mins
Cook Time 0 minutes mins
Total Time 15 minutes mins
Course Dessert
Cuisine French
Servings 4
Calories 300 kcal

Equipment

  • double boiler or microwave
  • kitchen mixer with whisk attachment
  • Cutting board
  • Sharp knife

Ingredients
  

  • 1 3.5 ounce dark chocolate bar
  • 4 cans full fat coconut milk or 1 can chickpeas
  • 1 teaspoon liquid stevia (or 1 tablespoon maple syrup)
  • 1/4 cup unsweetened, shredded coconut optional

Instructions
 

  • Chop the chocolate into small pieces, put into a bowl and heat in the microwave at 10 second intervals, stirring each time. When chocolate is completely melted, set aside. (Alternatively, you can melt the chocolate in the top of a double boiler.)
  • Open the cans and carefully remove the thick coconut cream (you should get about 16 ounces). In the kitchen mixer, with the whisk attachment, beat the coconut cream until stiff peaks form. Alternatively, use the liquid from a can of chickpeas instead.
  • Put the coconut cream into a large bowl and use a spatula to fold in the melted chocolate. Add the liquid stevia or maple syrup.
  • Top with shredded coconut, berries, or whipped coconut cream and serve.

Notes

This makes a very rich, dark chocolate mousse. If you want it to be sweeter, you could add some coconut sugar to the coconut cream before whipping it up. For a healthier version, you could also use aquafaba instead of the coconut milk. (Just use the liquid from one can of chickpeas and whisk in a mixer for about 9 minutes, until stiff peaks form.)

Follow me on Instagram @goodfoodfromtheheart and Pinterest at Good Food From the Heart and Facebook @GoodFoodFromTheHeart If you make this recipe, post it and be sure to tag me! Or Pin to Pinterest and make later.

Filed Under: Desserts, Recipes Tagged With: chocolate, coconut, mousse

Oat Milk Pumpkin Spice Latte (With Sugar Free Option)

December 31, 2020 by jenniferprovenza 1 Comment

By Jennifer Provenza at Good Food From The Heart

Pumpkin spice latte in a unicorn pink cut that says "Be Yoursel."

Updated 4/29/22

Whole foods plant based, oil free, sugar free, gluten free, nut free, soy free

This warm, comforting and silky smooth homemade oat milk pumpkin spice latte will make you excited to wake up in the morning!

Coffee, How Do I Love Thee?

Oh, coffee. Coffee. My old friend. I’m pretty sure I would not have survived new motherhood without it. I was blessed with two (two!) kids who did.not.sleep. And I love them so much. But in those early days of parenthood, I was so tired that I would randomely burst into tears. And I’m not talking about post partum depression. I was not depressed. Just tired in a way I have never been before or since. Tired in a way that you just can’t catch up on. I was so exhausted, that one morning I made a pot of coffee and poured it down the sink instead of in my cup!

Thankfully, my good friend coffee saw me through. And, now, I do get a good eight hours of sleep most nights. However, I still enjoy my morning cup of coffee. And sometimes a mid morning cup. And often an afternoon cup. Am I sometimes “a little much” in the morning, according to my husband? Possibly. Is my heart racing and are my sentences running on and on? Perhaps. But do I actually look forward to getting out of bed? Yes, I do!

The Best Cup of Coffee

All coffee drinkers have our favorite way of making coffee and our favorite varieties. Personally, I am currently obsessed with Mavericks Midnight Rider low acid coffee, which doesn’t give me heartburn. (Most regular coffees do.) Yet, what it lacks in acid, it makes up for in rich, delicious flavor. Otherwise, I also love Peet’s French Roast. And I do sometimes drink decaf if I’m craving a cup in the evening. I prefer to make my coffee in an Italian stainless steel mocha pot on the stovetop. I fill it to the max fill line with water and fill the coffee section to the top with coffee. That makes one strong, hot cup of coffee, just as I like it. French press or pour overs are good too. And, of course, a regular drip maker will work just fine for this recipe as well. Just be sure to make the coffee nice and strong, because this drink would usually be made with espresso. (If you have an espresso maker, go for it!)

Pumpkin spice latte in a unicorn pink cup that says "Be Yourself."
Don’t you just love that unicorn cup? I mean, how can you not enjoy drinking out of that??

Ingredients

Oat Milk: This recipe comes out delightfully creamy made with oat milk, but be sure you find a variety that is unsweetened and does not have added oil. I like Planet Oat Unsweetened Oat Milk.

Light Coconut Milk: I personally love the flavor and creamy mouthfeel of coconut milk and I make sure to use the light variety to lower the fat content.

Coffee: Make it very strong for this recipe, unless you prefer it otherwise.

Canned Pumpkin: This is optional, but I do love a little authentic pumpkin in my Oat Milk PSL.

Vanilla Extract: Adds a great boost to the flavor.

Pumpkin Spice: You definitely need some pumpkin spice to give it that seasonal, spiced flavor.

Liquid Stevia or Maple Syrup: For an entirely sugar free version, use liquid stevia. Otherwise, maple syrup will taste delicious.

Substitutions

For the Oat Milk: Feel free to use any variety of plant milk you prefer, it just may not be as creamy or froth as well. Almond milk or coconut milk are good substitutions.

For the Light Coconut Milk: If you want a super rich latte, you can use the full fat variety. Or, you can skip it entirely and just use extra oat milk.

For the Coffee: Don’t skip the coffee. What are you, crazy?! If you do want to make this for kids, though, you can leave the coffee out for a yummy pumpkin spice milk.

For the stevia or maple syrup: Feel free to use a sweetener of your choice, just be sure to check the conversion amount.

FAQS

Can you really make a delicious tasting dairy free pumpkin spice latte?

You sure can! Honestly, this version is way better than the Starbucks pumpkin spice latte. Try it once and you won’t go back!

Is this pumpkin spice latte gluten free?

Yes! Just make sure to use gluten free oat milk or substitute the oat milk with more coconut milk.

Is this pumpkin spice latte better with almond milk or oat milk?

It’s creamier with oat milk, but almond milk is fine too.

How many calories are in a pumpkin spice latte?

This version only has 220 calories and it has even fewer calories if you use all oat milk.

How can I store this?

You can refrigerate it for up to three days and reheat it as needed. Or drink it as an iced oat milk pumpkin spice latte!

How To Make It

Don’t worry, this vegan latte can be whipped up in no time, even on a busy morning. First, brew that strong coffee. Then, mix the coconut milk and oatmilk. You can use all coconut milk, but it’s too heavy for me, personally. And you can leave it out as well, but I adore the thick richness it adds to the drink.

Heat the milk (about 2 1/2 minutes in the microwave) or on the stovetop until very warm. Make it a little hotter than you normally would, because the blender will cause it too cool a little bit. Add in the optional pumpkin (if you want more authentic pumpkin flavor and a little more nutrients). Also add the coffee, the pumpkin spice, vanilla, and liquid stevia or maple syrup.

Put the mixture in the blender and blend until frothy. Pour your delicious vegan latte into your favorite mug and enjoy. For a really special breakfast, serve with my Caramelized Banana French Toast.

Pumpkin spice latte in a unicorn pink cut that says "Be Yourself"

Oat Milk Pumpkin Spice Latte

Jennifer Provenza
This warm and cozy spiced latte will brighten your morning and give you energy for your day.
4 from 1 vote
Print Recipe Pin Recipe
Prep Time 3 minutes mins
Cook Time 5 minutes mins
Total Time 8 minutes mins
Course Breakfast, Drinks
Cuisine American
Servings 1
Calories 220 kcal

Equipment

  • coffee maker
  • blender

Ingredients
  

  • 3/4 cup strong, brewed coffee
  • 1/3 cup canned light coconut milk
  • 2/3 cup oatmilk
  • 1 teaspoon canned pumpkin (optional)
  • 1/4 teaspoon vanilla extract
  • 1/4 teaspoon pumpkin spice
  • 1/4 teaspoon liquid stevia (or 1 tablespoon maple syrup)

Instructions
 

  • Start by brewing some nice, strong coffee. I use an Italian Mocha Pot. I fill the water line to the maximum and fill the coffee section full of ground coffee. A French press or pour over will be great too, but any coffee maker will do, just use at least 2 tablespoons ground coffee for each cup of coffee you are making.
  • Mix the coconut milk and oatmilk and heat until very warm. I do one minute in the microwave or just until it starts to simmer on the stovetop.
  • Add the milk mixture, coffee, pumpkin spice, canned pumpkin (if using), vanilla, and liquid stevia or maple syrup. Blend until mixed through and frothy.
  • Pour into your favorite mug and sprinkle with more pumpkin spice. Or, for a more decadent treat, top with coconut whipped cream.
Keyword coffee

Follow me on Instagram @goodfoodfromtheheart and Pinterest at Good Food From the Heart and Facebook @GoodFoodFromTheHeart If you make this recipe, post it and be sure to tag me! Or Pin to Pinterest and make later.

Filed Under: Drinks, Recipes Tagged With: coffee, latte, pumpkin

Sugar Free Raspberry Pancake Syrup

December 30, 2020 by jenniferprovenza 1 Comment

By Jennifer Provenza at Good Food From The Heart

Sweet and tart, spiced and citrusy. This warm and cozy sugar free Raspberry syrup recipe goes perfectly on pancakes, waffles, French toast, and even ice cream. Much lower sugar than maple syrup.

Updated 4/7/2022

Whole Foods Plant based, oil free, sugar free, gluten free, soy free, nut free

Sugar Free Raspberry Syrup

You are going to love this syrup! As a kid, I remember loving trying all the different fruit flavored syrups when my family went out for pancakes at IHOP. As fun as that was, those syrups were all so sugary and cloyingly sweet. This syrup, on the other hand, is fresh and tangy and has way less sugar and calories than maple syrup.

Ingredients

  • Frozen Raspberries: Feel free to use fresh raspberries if you prefer, but frozen are a lot cheaper and don’t go moldy so I usually use them.
  • Liquid Stevia or Maple Syrup: The liquid stevia will give you a completely sugar free version. I like Sweetleaf brand. The maple syrup will still be refined sugar free and will give you a sweeter result. Even using the maple syrup, however, the raspberry syrup will be much less sugary and caloric than straight maple syrup.
  • Vanilla Extract: The vanilla extract adds a delicious richness of flavor.
  • Orange zest: The orange zest adds a lovely tangy fresh flavor.
  • Cinnamon: The cinnamon adds to the sweetness and makes this syrup perfect to use over the holidays on a cozy morning.

Substitutions

  • For the raspberries: You can actually use lots of other fruits to make this syrup (blueberries, peaches, strawberries, etc… but raspberries are my favorite to use.
  • For the stevia or maple syrup: Feel free to substitute a different unrefined sugar or sugar substitute if you prefer.
  • For the vanilla extract: This recipe also tastes great with almond extract or even rum extract. Yum!
  • For the orange zest: Lime or lemon would be a fun substitute.
  • For the cinnamon: Nutmeg would also be yummy in this recipe.

FAQ

Is this raspberry syrup vegan?

You bet! It is suitable for vegans and diabetics too (if you use the sugar free option).

What can I put this raspberry syrup on?

This syrup goes great on pancakes, waffles, French toast, or even drizzled on oatmeal or ice cream. Yum!

How can I store this?

This syrup can be frozen indefinitely or kept in an airtight container in the refrigerator for up to a week.

How do you preserve homemade fruit syrup?

You also could preserve it by canning if that’s something you enjoy doing or you wanted to make a large batch and/or give it as gifts.

How To Make It

Start by putting the raspberries, water, orange zest, and cinnamon in a small sauce pan and cooking over medium heat until the raspberries have all broken down. If you are using maple syrup, add it now. The maple syrup version will (obviously) still contain sugar, but it will have no unrefined sugar and will certainly have less sugar than straight maple syrup. If you are using stevia, wait until the end to add it.

Sugar free raspberry pancake syrup in a pot.

Next, you will want to strain out the seeds, using a strainer over a bowl, otherwise the syrup will be chock full of them and that isn’t very appetizing. You will be left with a thin, dark red liquid. Return this to the pan. Bring to a boil. Mix the arrowroot powder with the water in a small bowl and whisk until it is well combined. Add to the syrup and cook for about two minutes or until the syrup has thickened a bit.

You can add a little bit more arrowroot mixture if it is too thin or a little bit of water if it is too thick. At this point, add the liquid stevia, stir, and serve over pancakes. This also is great on my Caramalized Banana French Toast.

Sugar free raspberry pancake syrup with orange slices.

You can store this in the refrigerator for up to a week if you want to make ahead and can also freeze for later use.

Warm and Cozy Raspberry Syrup

Sugar Free Raspberry Pancake Syrup

Jennifer Provenza
Sweet and tart, spiced and citrussy. This warm and cozy sugar free Raspberry syrup goes perfectly on pancakes, waffles, French toast, and even ice cream. Much lower sugar than maple syrup.
5 from 1 vote
Print Recipe Pin Recipe
Prep Time 5 minutes mins
Cook Time 7 minutes mins
Course Breakfast
Cuisine American
Servings 6
Calories 23 kcal

Equipment

  • small sauce pot
  • strainer
  • zester or box grater
  • bowl

Ingredients
  

  • 2 cups fresh or frozen raspberries
  • 1/3 cup water
  • 1 teaspoon liquid stevia or 1/3 cup maple syrup
  • 1 teaspoon vanilla extract
  • 1/2 teaspoon orange zest
  • 1/4 teaspoon cinnamon
  • 1 teaspoon arrowroot powder in 1/4 cup water

Instructions
 

  • Put the berries, orange zest, water, cinnamon, and maple syrup (if using) in a small saucepot and bring to a boil over medium heat. Cook, stirring constantly, for about five minutes, until all the raspberries have broken down.
  • Remove from heat and push through a fine strainer into a clean bowl, straining out all of the seeds.
  • Pour the strained raspberry juice back into the pot. Return to heat.
  • Mix arrowroot powder into 1/4 cup of water and stir until dissolved.
  • Pour the arrowroot mixture into the saucepan with the raspberry juice. Return to a boil and cook for about two minutes, until slightly thickened. You can always add a little more arrowroot powder and water if it is too thin. You can add a little bit more water if it is too thick.
  • Add the liquid stevia (if using) and stir. This version is fairly tart, so you can add more to taste.

Notes

Filed Under: Recipes, Sauces and Toppings Tagged With: raspberry, syrup

« Previous Page
Next Page »

Primary Sidebar

Delicious and Nourishing Food Made With Love

strawberry heart logo

About This Blog

I created this blog as a way to share my love of healthy cooking that also, (and frankly) most importantly, tastes absolutely delicious! All the foods on this blog contain completely whole foods plant based ingredients. This means I make them from unprocessed, plant based ingredients and do not include oil or refined sugars. Many of these recipes are gluten free (or have easy gluten free subs) and many are nut or soy free as well (or can easily be made so).

Archives

  • May 2022
  • March 2022
  • January 2022
  • December 2021
  • November 2021
  • October 2021
  • September 2021
  • August 2021
  • July 2021
  • June 2021
  • May 2021
  • April 2021
  • March 2021
  • February 2021
  • January 2021
  • December 2020

Copyright © 2026 Good Food From The Heart on the Foodie Pro Theme